How to Edit AVI Files with AVI Video editor
Q : "Before I tried to edit avi video files many times on windows movie maker. But every time I dragged and dropped the loaded videos to the timeline, it can only edit the audio timeline. For these kinds of problem, is there any useful avi editor software to help me to edit avi videos on windows?” --- Question from Andy Bona
Here highly recommend Wondershare Video Editor which is a AVI editing software to edit .AVI video. It has friendly-users interface and it is a easy-to-handle tools that deserves your praise. Please read the guidance and you will know easily to edit AVI video on windows OS.
Note: If you are using Mac OS and want to edit avi files, you can refer to Video Editor for MAC here.
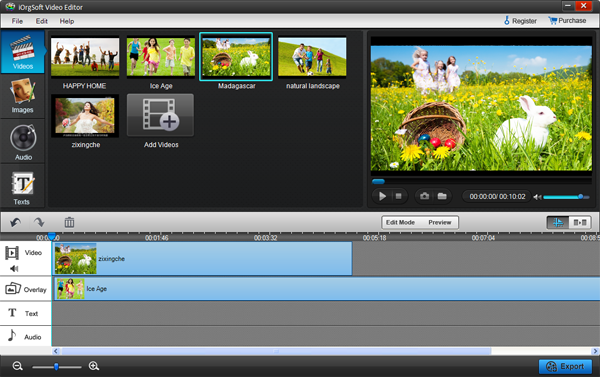
Step 1: Import AVI videos to the AVI video editor
Click "Import" and browse from your hard drive to choose the AVI videos you want to edit or drag and drop AVI files to the resource pane directly to import them. And you can load batch videos. Then drag and drop the videos to the video track for editing.

Step 2: Edit AVI videos
Lots of built-in tools for you to enhance the videos, and by setting titles, effects and photos with transitions, it can make your videos so amazing. such as clip your AVI videos to smaller videos, crop off some redundant parts, put some videos into a big or add specially good effects to tailor-made the AVI videos.

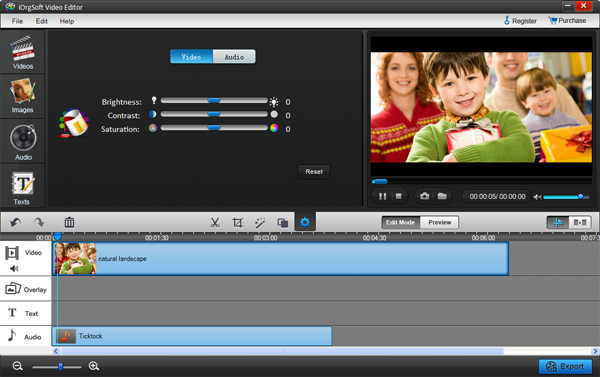
Effect: On Setting tabs, you can set your video brightness, contrast, saturation and hue from Video sub-tab, add some specially good effect to your video from Effect sub-tab (More than 50 special effect you can find from three main categories: Adjust, Distortion, Filter). In addtion, you can also edit for audio like Volume, Fade in and Fade out.
Crop: Preview the video, hit the video in the timeline, and then click Settings on the top of the panel to have an interface where you can trim you video files, you can crop off your video in four directions and you can rotate the video in 360 degrees.
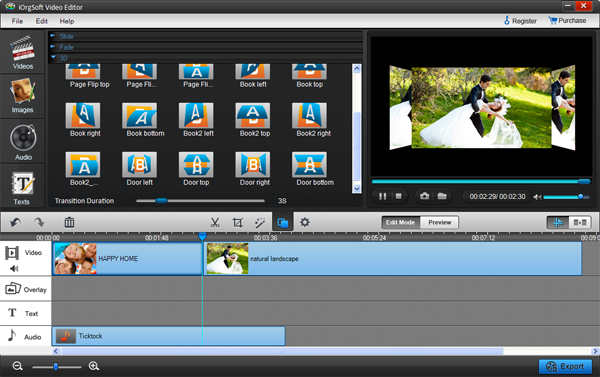
Step 3: Add transition to video
On the bottom of the panel, you can see timeline with five layers: Text, Video A, Transitions, Video B and Audio. You can add any effects from the five formats as transitions between videos. Besides, you can also add special transition from Transition tab on the top of the panel which can be selecting from "Fade", "Slide" and "3D" sub-tab of Transition to make more pretty videos.

Step 4: Save and publish
After editing, click "Create" to save AVI files. Of course you can set the video or audio parameters like Bit Rate, Encoder, Resolution etc.

Extended Reading About AVI Video
Avi format is incredibly widespread all over the world. This format can be recognized by any device or digital video player. Due to the fact that this format is very compact, avi is also incredibly popular on the Internet. You can find a great number of movies, TV shows and video clips saved in avi and available for downloading. If you want to upload your video to a vlog or Youtube, it can be a good idea to save it in avi. Besides, when your video files are stored in this format, you will always be able to modify them in the avi editor. In other words, you will be able to create your own video clips or movies.
Related Articles:
- Video Tools
- DVD Tools
- Audio Tools
- Security Tools
- Mac Video Tools
- Mac DVD Tools
- Mac Audio Tools
- Mac Security Tools
-
MXF to MOV | FLAC to MP3 | AVI to MOV | FLV to MOV | MOD to MOV | MTS to MOV | MXF to AVI | MXF to FCP | MXF to iMovie | TOD to MOV | VOB to MOV | MTS to MP4 | FLV to MP4 | MTS to MOV | MTS to DVD | Lockdir | MP4 Editor | FLV Editor | MTS Editor |

